Showing posts with label Birthday Bash. Show all posts

Monday, May 9, 2011

For A Guy

Hey scrappers! I want to apologize for my shortage of posts lately, I guess I lost my crafty mojo for a little while. I'm sure most of you know what that's like. I want to share a banner and card that I made for my brother. He just graduated with his Master's Degree, so of course we had to party! I made a banner and matching card. I know a lot of people struggle with making masculine cards or projects so I thought I'd share these with you, and maybe it will inspire you a little.

There are a couple of things that I think are important when making a card for a guy: keep it simple and choose masculine colors and patterns. Now I will admit I've used flourishes and damask prints for boy pages, which is fine, I think it's important to keep the guy in mind. So for this card and banner I used a new paper stack from Papertrey Ink called "Argyle Socks". It has blues and greens in it and the prints include diamonds and of course, argyle. The solid cardstock is also Papertrey Ink, Enchanted Evening, Kraft and Smokey Shadow.


The banner pieces, layer and shadow, are from the Birthday Bash cartridge. The banner was cut at 6-inches. The font, both layer and shadow are from the same cartridge and were cut at 3-inches.

I attached eyelets with my crop-a-dile and used black grosgrain ribbon from Stampin' Up. As you can see from the pictures I didn't add any "extras", no stitching, bling, etc. This banner went over really well, in fact my brother took it home with him. Although I think it was more of a reminder to everyone who enters his house to continue to congratulate him and pat him on the back, so to speak. You know those youngest children are always looking for attention, lol!

The card is a standard A2 size, cut portrait style. I used the same paper stack and solid cardstock. The mat that I stamped my sentiment on is from the the Cricut Essentials cartridge that came with the E2. It's label number 2. I cut both the layer and the shadow, can't remember the size. To finish the card I added satin ribbon. I could have chosen to use the grosgrain again, but it's kind of a sophisticated card and I liked the look of the satin better.


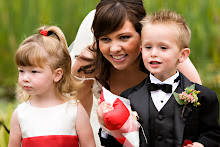
And finally...a picture of the grad and his wife. I'm so proud of you Dudley and I love you very much!


Thanks for stopping by, I hope to see you back here soon. Thank you for your comments and support!
Sunday, January 23, 2011

Cards!

Good afternoon! Even though it was a slow crafting week for me, I managed to get a few cards done. You might notice that I was really enjoying both the 'seeing spots' embossing folder and twine this week. Why change a good thing, right?

This is a standard A2 size card created using the 'Birthday Bash' cartridge. I absolutely love this cart and can definitely see myself using it for so much more than birthdays. The grass and cloud are from 'Create A Critter' and the sentiment is from the Scrappy Moms Designer's Choice set. The glitter is Martha Stewart.


This is a fun get well soon card. I used '3 Birds On Parade' for the cuts on this cartridge. I was hoping to get a better picture of the rain drops so you could see the glossy accents that I added to them, but I just couldn't capture it. I really like the added dimension and 'wet' look it created. The card base, standard A2, and layer are both from the 'Christmas Cards' cartridge. Of course I used a Peachy Keen stamp for the sweet little birds face. The sentiment is computer generated. I also did some inking around the edges and added some doodling for the finishing touches.

Thanks for stopping by. I'll see you back here soon and as always I enjoy your comments and/or questions.

Wednesday, January 12, 2011

Back to School Layout


Hello my friends, I hope you're having a great week. Today I have a quick and simple back to school layout to share with you. What, I'm the only one behind on my scrapbooking?!? LOL. I thought I would take a brief break from holiday layouts and work on this layout before I start Valentine's Day projects. No, it's not your eyes, the picture is totally crooked! Sorry about that.


Like I said, this was a very simple and quick layout to put together. I cropped some photos, picked my images, paper, and went to work. I need to allow myself to do more of these kinds of layouts and not stress out so much about every detail. I'm not a professional, and the most important part of scrapbooking is to save and document memories!


Details:
  • Pattern Paper- Fancy Pants 'Little Boy' Collection
  • Cardstock- Bazzil (white) and Papertrey Ink
  • Center "Shape"- Nifty Fifties cut a 11.31-inches
  • Worm- Create a Critter cut at 3.5-inches with layer. I used the hide contour feature on my Gypsy to hide his face
  • Title- back and school: Birthday Bash cut at 2-inches with shadow 2: Nifty Fifties cut at 3-inches.
  • Stickers and Border- Fancy Pants Paper Collection
  • Button- Stampin' Up
  • Peachy Keen-Everyday Character Faces
Thanks for stopping by. I hope you'll be able to get a little inspiration or perhaps a little push to pull out some of those older pictures to scrap. Thank you for stopping by, your comments and feedback mean a great deal to me. See you back here soon.

Tuesday, January 4, 2011

Dance Like No One Is Watching

Hello my bloggy friends. I have a card to share with you today that I created for the Pink Stamper Design Team call. I have to admit, it didn't turn out as perfectly as I envisioned, but I think I will enter it anyway. I guess it was just one of those days...the paper didn't cut as well as it normally does, the stamp didn't come out just right...you know those days. Perhaps Robyn can overlook my imperfections, lol! Onto the card.

We were instructed to create a new project and incorporate the colors pink, brown, green, and one additional color of our choice.


Details:
  • Cardstock-Pink (Stampin'Up), Aqua Mist (Papertrey Ink)
  • Pattern Paper-Fancy Pants 'Wishful Thinking Collection'
  • Base Card shape cut from 'Birthday Bash' Cricut cartridge, sized at 11 x 4.25-inches (using my gypsy)
  • "Kim"-'Rock Princess' Cricut cartridge cut at 4.5-inches
  • Layer 1 (pattern paper)- 5 x 4-inches
  • Layer 2 (aqua mist)- 4.5 x 2.5-inches
  • Pink By Design Stamp Set-Girls Just Wanna Have Fun
  • Peachy Keen Stamps-Princess Face Assortment
  • Prima Pearls
  • Jolee Rhinestones
  • Velvet Ribbon (Papertrey Ink)
  • And last, but not least, I added some stitching
Okay off to link my post. Thanks for stopping by and I'll see you tomorrow.

Sunday, November 14, 2010

Sunday Share

Hello. I want to share a couple of projects I've worked on in the last week. I'm pretty excited about this first project because it's so quick and my mind is filled with possibilities. I used my Imagine on this one and I'm very pleased with the way it turned out.
I purchased an 8x8 canvas album from Joanne's and some iron-on fabric sheets for ink jet printers. The brand is Quick Fuse, in case you're curious, and comes with 3, 8 1/2 x 11-inch sheets. I placed the fabric sheets on my Imagine mat and chose a couple of images from the 'Boys Will Be Boys' cartridge. The patterns and colors of the images are from 'Imagine More'. Isn't this so fun?! I'm really excited to do some more playing.


Next is a fun 6x6 card I made for my SIL to take to a baby shower. I was told the card was for a boy and given a few colors. So I had to use my new 'Birthday Bash' cartridge. I absolutely love it, there are so many fun images along with a font, phrases, cards and tags. This cartridge is really versatile. Did I convince you to purchase this cartridge yet?! Maybe some pictures will help, lol.


I cut the elephant and all his layer at 4-inches. The scalloped square is from 'Accent Essentials' and cut at 5 1/2 x 5 1/2-inches real dial size on my Gypsy. The solid cardstock is Papertrey Ink (PTI) and the pattern paper is Fancy Pants. Both of the tags (outside and inside) are die cuts from PTI and the stamps are from PTI as well. I added some stitching, twine from PTI, and an orange button from StampinUp.

Thanks for stopping by. I appreciate all of your comments.